When you place the first view on a sheet using the View Wizard command, the sheet scale is set by default to the scale of that view, and it is associative to the view. Before placing the view, you can change the view scale using the Scale list on the command bar. This, then, becomes the sheet scale.
Views placed after the first view use the same sheet scale. This ensures that the scale of all drawing views on the sheet is consistent.
Choose Home tab→Drawing Views group→View Wizard  .
.
(Select a model) Do either of the following:
In the Select Model dialog box, select a part (.par) or sheet metal (.psm) document, and then click Open.
In the Library docking window pane, browse to a part or sheet metal document, and then drag it from the Library onto the drawing sheet.
The View Wizard command bar is displayed, and a preview of the model view is shown on the sheet. The default drawing view orientation is based on the type of model you selected and the drawing template you are using.
Example:
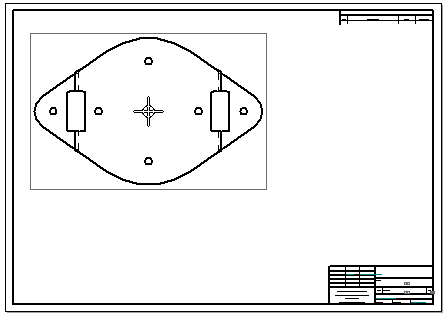
For a part model or an as-designed sheet metal model, a front view is created. This example shows a VHL preview of the part view using dynamic display mode.
(Place the primary view) Do one of the following:
If the drawing view is formatted the way you want it to be, then move the view where you want to place it and click.
To change the view orientation, apply shading, or change the drawing view scale, select options on the View Wizard command bar to adjust the formatting, and then click to place the view.
For more information about these options, see Tips, below.
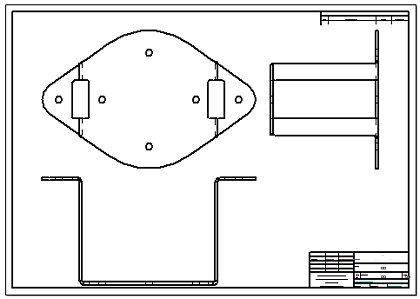
(Place additional views) Continue placing orthographic or isometric views by clicking above or below, to the right or left, or diagonally with respect to the initial view.
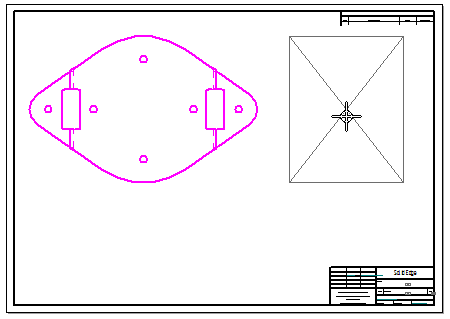
For each of these principal views, a range box indicates the size and general orientation of the view being created.
Example:
When you are finished creating drawing views, press Esc to exit the Drawing View Wizard.
Tip:
Another way to create drawing views folded from the primary view is to use the Drawing View Wizard (Drawing View Layout ) dialog box. Click the Drawing View Layout  option on the View Wizard command bar, and then select a primary view direction from the Primary View list, and select any additional views you want to generate on the sheet.
You can change the drawing view preview type using the Dynamic display check box for each type of model on the Drawing View Wizard tab (Solid Edge Options dialog box).
Before you place a drawing view, you can select the Drawing View Wizard Options button on the command bar to specify additional content and display options for it based on the model type and the view type. For a sheet metal model, you can choose as-designed, simplified, or flattened, specify hidden and tangent edge display, and include model dimensions and annotations.
Before you place a drawing view, you can change the drawing view direction and orientation using either of the following options on the View Wizard command bar:
Click View Direction  , and then select a default view or a named view from the list.
Click Drawing View Layout , and then select the Custom button in the Drawing View Creation Wizard (Drawing View Layout). This displays the part view in the Custom Orientation dialog box, where you can choose a default or custom view orientation, rotate the model, and align the model to a face or an edge to an axis. You also can create a perspective drawing view.
After placing a drawing view, you can select it and then modify its formatting using the options on the Drawing View Selection command bar.
By default, the View Wizard calculates the best fit for the drawing views based on the model size and the sheet size. You can change the drawing view scale by:
Choosing a different scale from the Scale list.
Setting the drawing view scale to match the current sheet scale. To do this, click the Set View Scale button.
For more information, see Sheet scale and drawing view scale.
Drawing view captions may be turned off and on for a selected drawing view using the Show Caption button on the command bar. You also can modify the default caption by typing in the Caption box on the command bar, or using the Drawing View Properties dialog box.
For more information, see Modifying captions.