In the ordered environment, you can construct drawn cutouts using the Drawn Cutout command.
In the synchronous environment, you can construct drawn cutouts using the Drawn Cutout command or the Select tool. Both workflows are explained in this topic.
Choose Home tab→Sheet Metal group→Dimple list→Drawn Cutout.

Define the profile plane.
Draw a profile or copy a profile into the profile window.
Choose Home tab→Close group→Close.

Do one of the following:
If you drew a closed profile, skip to step 6.
If you drew an open profile, click to define the material side.
Click to define the extent.
Finish the feature.
Choose Home tab→Sheet Metal group→Dimple list→Drawn Cutout .
Select the region(s) to define the drawn cutout.
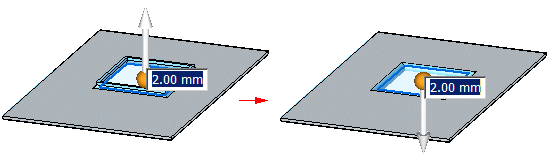
Type a value for the drawn cutout extent or use the mouse wheel for a dynamic preview of the cutout.
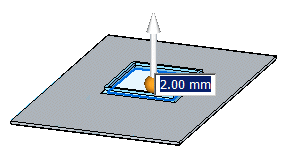
(Optional) Click the handle to change the drawn cutout direction.
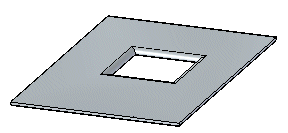
Right-click to place the cutout.
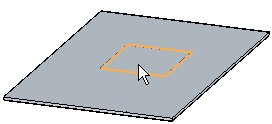
Select the region(s) to define the drawn cutout.
Choose Home tab→Sheet Metal group→Dimple list→Drawn Cutout .
Type a value for the drawn cutout extent or use the mouse wheel for a dynamic preview of the cutout.
(Optional) Click the handle to change the drawn cutout direction.
Right-click to place the cutout.