 Auxiliary View command
 Auxiliary View command
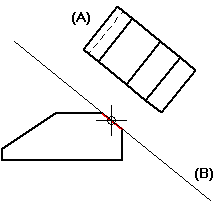
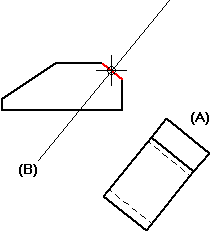
Creates a new part view (A) that shows the part rotated 90 degrees about a viewing plane line (B) on an existing part view. The viewing plane line can be parallel or perpendicular to the geometry in the existing view.
You can use an auxiliary view to show geometry that cannot be dimensioned at any of the orientations shown in principal views or existing auxiliary views.


After you place the auxiliary view, you can:
Move the viewing plane line in any direction using Shift+drag.
Change the viewing plane line type, caption, and style in the Viewing Plane Properties dialog box.
Show or hide the viewing plane caption using the View Plane Selection command bar.