 Match Flange Face command
 Match Flange Face command
Matches a selected flange face coplanar to a target face.
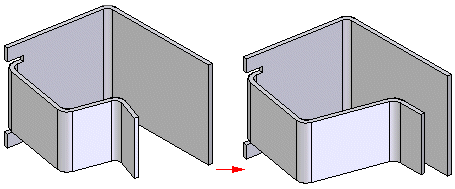
The target face can be a face within the same sheet metal part,
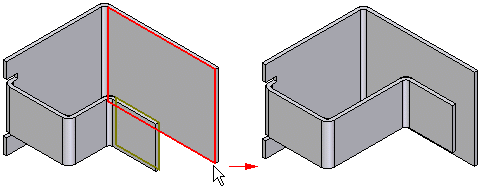
a face on another part,
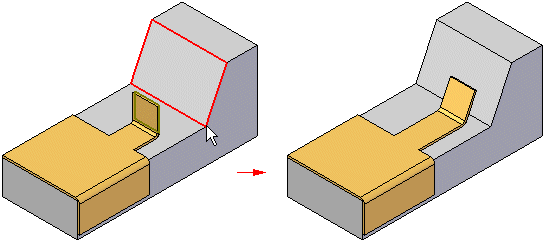
or, a reference plane.
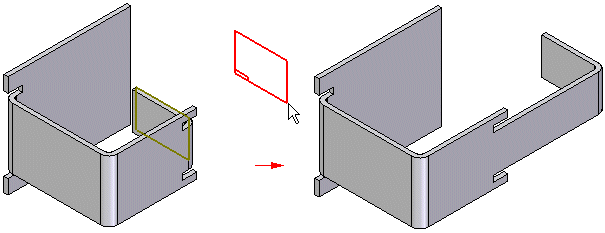
Note:
When matching a face to another part in an assembly, you must use the Inter-Part Copy command on the Insert menu to copy the target face into the active document first.
Target faces must be a planar surface. You cannot select a splined surface or a curved surface for a target face. The flange that is matched to a target face is associative to the target face. Changes made to the target face are reflected in the matching face.
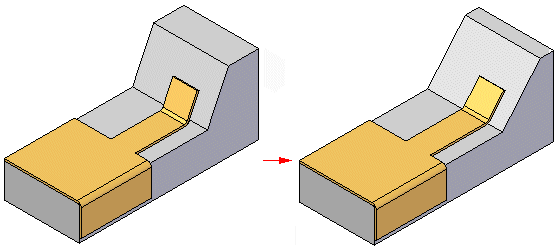
To match flange faces:
| Step 1. |
Select the flange face you want to match.
|
| Step 2. |
Select a target face and enter an offset value if you want the faces to be offset.
|
| Step 3. |
If you entered an offset value, click to indicate the offset direction.
|
| Step 4. |
Click Finish to match the faces.
|
In cases where the target face is out of alignment on 2 axes, the bend may need to be rotated along with the flange to match the target face.
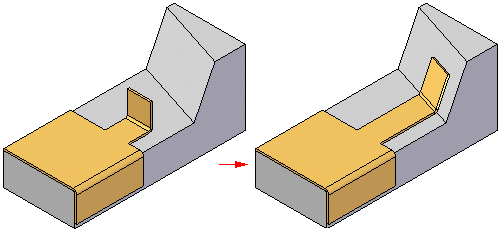
In cases such as this, the face being matched is extended until it makes contact with the target face. The bend is then rotated to become parallel with the target face. The flange is angled to be parallel with the target face and the faces are matched.
Note:
The bend radius of the flange may change as a result of using this command. You can compensate for this by using the Resize Bend Radius command. For more information, see How To resize a bend radius directly.